1. Getting started
1.1 Fork the starter app
The first step is to fork the starter application on Codesandbox. The starter is a slightly modified version of the completed sandbox from workshop 1.
Make sure you are signed into Codesandbox and go to the following URL:
https://codesandbox.io/s/context-and-hooks-starter-o8cb9z
Click on the Fork button in the upper right area of the UI.

1.2 Recap from workshop 1
Workshop 1 created a simple posts application with some basic CRUD functionality.
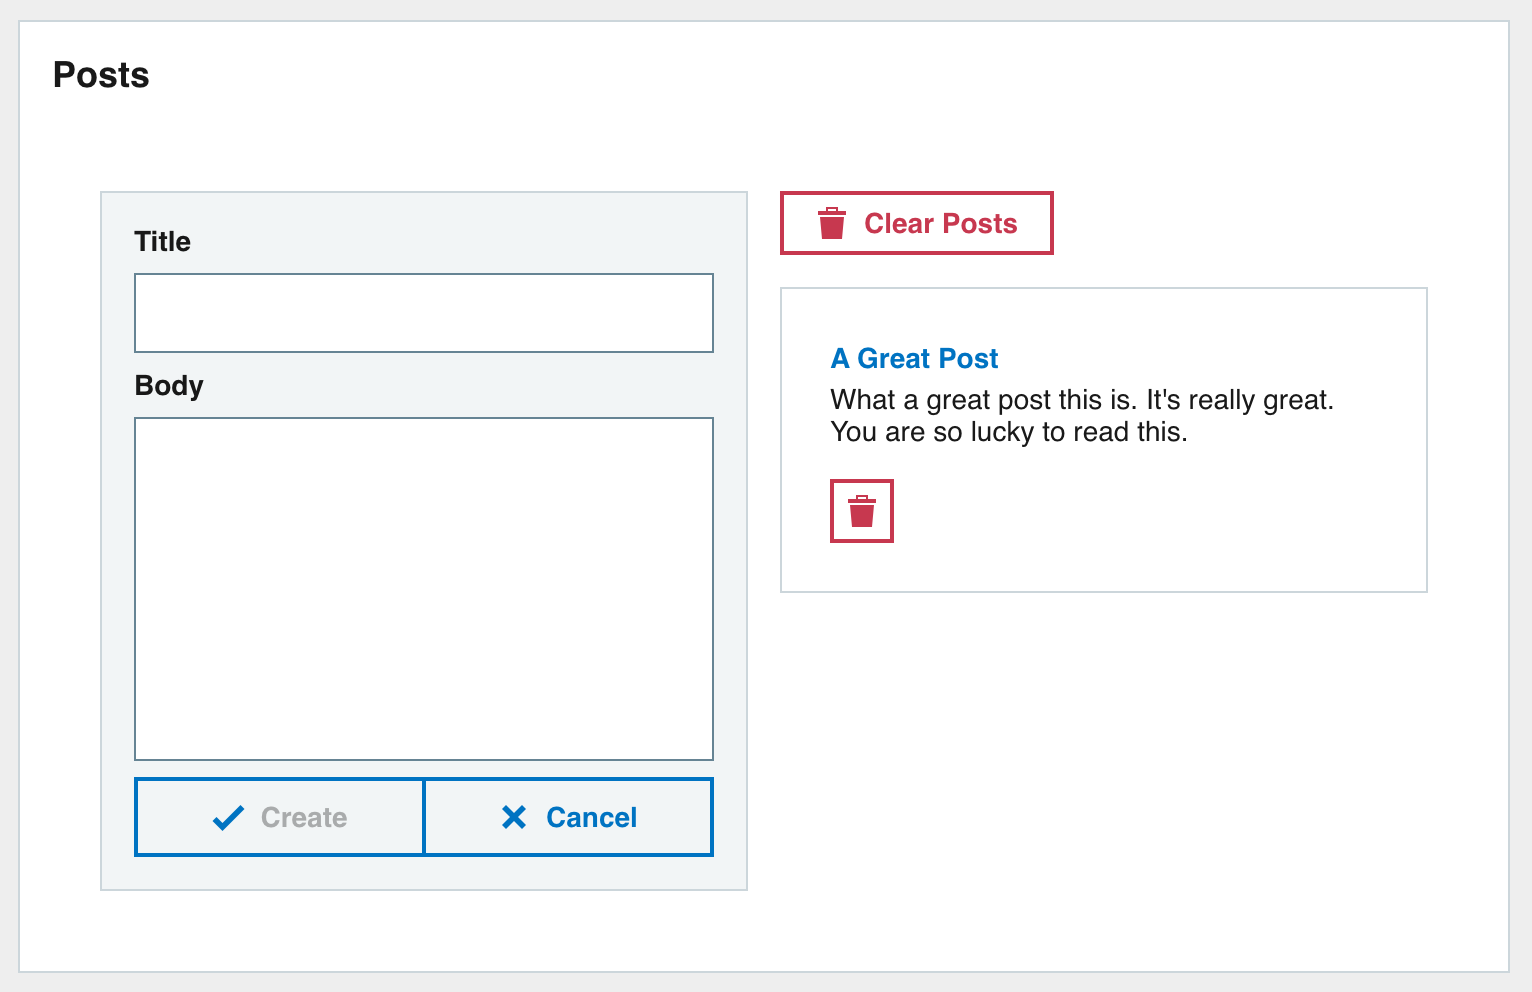
The completed app from workshop 1 had a two column layout.
The left column contained a Form component for post creation.
The right column contained a PostsList component that lists Post components along with delete functionality.
1.3 What will we make?
Workshop 2 will refactor and improve the posts app we made in workshop 1. Updates will incorporate:
- React Context
- Custom Hooks
- Testing with React Testing Library
2. Creating Posts Context
2.1 Why do we need a Posts Context?
You will notice from the starter application that the deletePost function is passed to the PostsList component which is turn pass the function to the Post component.
This passing of props through a component tree is called Props Drilling. A solution to Props Drilling is to use the React Context API. The React Context API allows you to share data between components without needing to pass the value to each component.
The 4 steps for creating and using a context:
- Use the
createContextmethod, create a context.- Wrap your context provider around the component tree.
- Populate the value prop of the context provider with what you want to share.
- Within any component use the context consumer or
useContexthook to read the value.
2.2 Create posts-context.js
Create a new context directory under src with a new file posts-context.js.
To create a new context use the React.createContext method.
The value you pass to the method is the default value for the context. Populate the value with an object and dummy deletePost method.
import React from "react";

export default React.createContext({
  deletePost: () => {}
});
Note: The default context value will be used if trying to read the context value from outside the provider
2.3 Wrap the context provider in App.js
In App.js import the posts-context.
import PostsContext from "context/posts-context";
Then we will wrap the PostsContext.Provider around the posts Pod and populate the value with the deletePost function we have defined in App.js.
Since we are using the context to pass the deletePost function you can remove the deletePost prop from the PostsList component.
<div className="app">
  <PostsContext.Provider
    value={{
      deletePost
    }}
  >
    <Pod title="Posts">
      <GridContainer>
        <GridItem gridColumn="1/7">
          <Form onSubmit={createPost} />
        </GridItem>
        <GridItem gridColumn="7/13">
          <PostsList posts={posts} clearPosts={clearPosts} />
        </GridItem>
      </GridContainer>
    </Pod>
  </PostsContext.Provider>
</div>
Now that we have wrapped the components with the context provider any wrapped component can read the value from the context.
2.4 Read value from context
The deletePost function we added to the context can be used by the Post component.
In components/post.js import the useContext Hook. This Hook is used to read from a context. We also need to import the PostsContext context.
import React, { useContext } from "react";

import PostsContext from "context/posts-context";
We wont be needing the deletePost prop anymore since we will read directly form the context so you can remove it from the component definition.
Now read the deletePost value from the PostsContext using the useContext Hook.
const { deletePost } = useContext(PostsContext);
The fully updated components/post.js component reading from the context will now look like this:
import React, { useContext } from "react";
import PropTypes from "prop-types";

import Content from "carbon-react/lib/components/content";
import Typography from "carbon-react/lib/components/typography";
import Button from "carbon-react/lib/components/button";
import PostsContext from "context/posts-context";

const Post = ({ post }) => {
  const { deletePost } = useContext(PostsContext);

  // Construct a title using the Typography component
  const title = (
    <Typography variant="strong" color="primary">
      {post.title}
    </Typography>
  );

  return (
    <Content title={title}>
      <div>{post.body}</div>
      <Button
        aria-label="delete-post"
        destructive
        size="small"
        iconType="bin"
        mt={2}
        id={post.id}
        onClick={() => deletePost(post)}
      />
    </Content>
  );
};

Post.propTypes = {
  post: PropTypes.object
};

Post.defaultProps = {
  post: {}
};

export default Post;
2.5 Tidying up
Since we are using the context instead of Props Drilling for the deletePost function we should remove any props references to it.
Open components/posts-list.js and remove any references to the deletePost function. These are not needed here now since the Post component will get the function directly from the context.
3. Creating custom Hook
App.js contains a lot of boilerplate code for generic CRUD (Create Read Update Delete) functionality. This code could be abstracted out into a custom Hook and used in other components that require CRUD features in the future.
3.1 Create useCRUD
Create a new directory hooks under src and create a new file useCRUD.js inside.
Remember custom Hooks must start with the word
use
Our useCrud Hook accepts one parameter for defaultData with a default value of [].
The defaultData is used to populate a data state. The data state will be used to store an array of objects.
Dummy functions are added for each of the actions we want to perform.
An object is returned from the Hook containing the data state and all the functions needed to manipulate the data state.
This will give a consuming component access to the data and functions contained in the Hook.
The initial state of the useCRUD Hook code:
import { useState, useCallback } from "react";

const useCRUD = (defaultData = []) => {
  const [data, setData] = useState(defaultData);

  const clearData = () => {};
  const createData = () => {};
  const updateData = () => {};
  const deleteData = () => {};

  return {
    data,
    clearData,
    createData,
    updateData,
    deleteData
  };
};

export default useCRUD;
We will use the useCallback Hook to create memoized functions for each of the actions. useCallback is useful to prevent rerendering of child components that use callback functions.
3.1.1 clearData
The clearData function is very simple, it will just set the data state back to an empty array [] using the setData function.
const clearData = useCallback(() => {
  setData([]);
}, []);
Note: React guarantees that setState functions identity is stable and won’t change on rerenders. This is why it’s safe to omit from the useEffect or useCallback dependency list.
3.1.2 createData
The createData function accepts a newItem parameter and prepends it to the data array using the setData function. Passing a function into setData will give access the the current values in data.
const createData = useCallback(
  (newItem) => {
    setData((previousData) => [newItem, ...previousData]);
  },
  []
);
3.1.3 updateData
The updateData function accepts an updatedItem parameter, it then finds its index in the data array and sets the updatedItem in place. We need to access data directly so include it in the dependencies array.
const updateData = useCallback(
  (updatedItem) => {
    const index = data.findIndex((d) => d.id === updatedItem.id);
    if (index > -1) {
      const updatedData = [...data];
      updatedData[index] = updatedItem;

      setData(updatedData);
    }
  },
  [data]
);
Note: Any value referenced inside the callback should be included in the dependencies array
3.1.4 deleteData
The deleteData function accepts a deletedItem parameter. The setData function will filter the data values to exclude the object provided, essentially deleting the object.
const deleteData = useCallback((deletedItem) => {
  setData((previousData) =>
    previousData.filter((d) => d.id !== deletedItem.id)
  );
}, []);
3.1.5 Completed Hook
With all the actions completed the finished useCRUD Hook will look like this:
import { useState, useCallback } from "react";

const useCRUD = (defaultData = []) => {
  const [data, setData] = useState(defaultData);

  const clearData = useCallback(() => {
    setData([]);
  }, []);

  const createData = useCallback((newItem) => {
    setData((previousData) => [newItem, ...previousData]);
  }, []);

  const updateData = useCallback(
    (updatedItem) => {
      const index = data.findIndex((d) => d.id === updatedItem.id);
      if (index > -1) {
        const updatedData = [...data];
        updatedData[index] = updatedItem;

        setData(updatedData);
      }
    },
    [data]
  );

  const deleteData = useCallback((deletedItem) => {
    setData((previousData) =>
      previousData.filter((d) => d.id !== deletedItem.id)
    );
  }, []);

  return {
    data,
    clearData,
    createData,
    updateData,
    deleteData
  };
};

export default useCRUD;
3.2 Testing custom Hooks
The @testing-library has support for testing custom Hooks. Just make sure you have all the necessary packages installed:
@testing-library/react@testing-library/jest-dom@testing-library/react-hooks
3.2.1 Create useCRUD test
In the hooks directory create useCRUD.test.js.
Import the useCRUD Hook for testing, also import renderHook and act from @testing-library/react-hooks/dom, we will be using these. Create a describe block to hold the test cases and an object we will use for testing.
The basic test file will look like this:
import { renderHook, act } from "@testing-library/react-hooks/dom";
import useCRUD from "./useCRUD";

describe("useCRUD", () => {
  let obj = { id: 1, title: "title 1" };

});
The renderHook function renders a test component that will call the provided callback, including any hooks it calls, every time it renders. The function returns an object containing a RenderHookResult which is also an object in the form:
{
  all: Array<any>
  current: any,
  error: Error
}
The current value of the result will reflect the latest of whatever is returned from the callback passed to renderHook.
We will be testing the elements of the return value from our useCRUD Hook, which is:
{
  data,
  clearData,
  createData,
  updateData,
  deleteData
}
3.2.2 Test clearing data
Lets create a test case for clearing data using the clearData Hook function we created.
Call the renderHook function and pass a callback in which calls useCRUD with a default value. We will test this value is removed by the clearData function.
Destructure the result from the return value of renderHook.
const { result } = renderHook(() => useCRUD([obj]));
result.current refers to the return value from our useCRUD Hook.
Then inside an act function call we will trigger the clearData function from result.current.
When writing UI tests, tasks like rendering, user events, or data fetching can be considered as “units” of interaction with a user interface. react-dom/test-utils provides a helper called act() that makes sure all updates related to these “units” have been processed and applied to the DOM before you make any assertions:
act(() => {
  result.current.clearData();
});
Then afterwards we will expect the value of data to make sure it has been set to an empty array.
expect(result.current.data).toEqual([]);
All together those changes look like:
test("clearing data", () => {
  const { result } = renderHook(() => useCRUD([obj]));

  // To prepare a component for assertions, wrap the code rendering it
  // and performing updates inside an act() call. This makes your test
  // run closer to how React works in the browser.
  act(() => {
    result.current.clearData();
  });

  expect(result.current.data).toEqual([]);
});
3.2.3 Test creating data
Next we’ll test creating data using the createData function.
Setup the renderHook call similar to before but don’t provide a default value this time in useCRUD.
Check the data value before and after the createData call. The expectation after the call should include the object provided to createData.
test("creating data", () => {
  const { result } = renderHook(() => useCRUD());
  expect(result.current.data).toEqual([]);

  // To prepare a component for assertions, wrap the code rendering it
  // and performing updates inside an act() call. This makes your test
  // run closer to how React works in the browser.
  act(() => {
    result.current.createData(obj);
  });

  expect(result.current.data).toEqual([obj]);
});
3.2.4 Test updating data
Next we’ll test updating data using the updateData function.
Setup the renderHook call similar to before but don’t provide a default value this time in useCRUD.
Check the data value after the updateData call. The expectation after the call should include the updated object provided to updateData.
test("updating data", () => {
  const { result } = renderHook(() => useCRUD([obj]));

  // To prepare a component for assertions, wrap the code rendering it
  // and performing updates inside an act() call. This makes your test
  // run closer to how React works in the browser.
  act(() => {
    result.current.updateData({ ...obj, title: "New Title" });
  });

  expect(result.current.data).toEqual([{ id: 1, title: "New Title" }]);
});
3.2.5 Test deleting data
Next we’ll test deleting data using the deleteData function.
Setup the renderHook call similar to before and provide a default value this time in useCRUD.
Check the data value after the deleteData call. The expectation after the call should equal an array without the object provided to deleteData.
test("deleting data", () => {
  const { result } = renderHook(() => useCRUD([obj]));

  // To prepare a component for assertions, wrap the code rendering it
  // and performing updates inside an act() call. This makes your test
  // run closer to how React works in the browser.
  act(() => {
    result.current.deleteData(obj);
  });

  expect(result.current.data).toEqual([]);
});
3.2.6 Completed useCRUD tests
The completed test file for useCRUD should look like this after you’ve added all the test cases.
import { renderHook, act } from "@testing-library/react-hooks/dom";
import useCRUD from "./useCRUD";

describe("useCRUD", () => {
  let obj = { id: 1, title: "title 1" };

  test("clearing data", () => {
    const { result } = renderHook(() => useCRUD([obj]));

    act(() => {
      result.current.clearData();
    });

    expect(result.current.data).toEqual([]);
  });

  test("creating data", () => {
    const { result } = renderHook(() => useCRUD());
    expect(result.current.data).toEqual([]);

    act(() => {
      result.current.createData(obj);
    });

    expect(result.current.data).toEqual([obj]);
  });

  test("updating data", () => {
    const { result } = renderHook(() => useCRUD([obj]));

    act(() => {
      result.current.updateData({ ...obj, title: "New Title" });
    });

    expect(result.current.data).toEqual([{ id: 1, title: "New Title" }]);
  });

  test("deleting data", () => {
    const { result } = renderHook(() => useCRUD([obj]));

    act(() => {
      result.current.deleteData(obj);
    });

    expect(result.current.data).toEqual([]);
  });
});
4. Use useCRUD hook in App
Now that we have created and tested our custom useCRUD Hook its time to use it in the posts app.
First import the Hook from the hooks directory.
import useCRUD from "hooks/useCRUD";
Now we need to call the useCRUD hook and handle the return value. Use destructuring assignment renaming to rename the values to match our posts implementation. data becomes posts, clearData becomes clearPosts etc.
const {
  data: posts,
  clearData: clearPosts,
  createData: createPost,
  deleteData: deletePost
} = useCRUD();
We can now get rid of the existing implementation for clearPosts, createPost and deletePost located in App. You can also remove { useState, useEffect } as they are no longer being used here now.
With those changes App.js will now look like this:
import React from "react";

import { GridContainer, GridItem } from "carbon-react/lib/components/grid";
import Pod from "carbon-react/lib/components/pod";

import PostsContext from "context/posts-context";
import Form from "components/form";
import PostsList from "components/posts-list";

import useCRUD from "hooks/useCRUD";

import "./styles.scss";

export default function App() {
  const {
    data: posts,
    clearData: clearPosts,
    createData: createPost,
    deleteData: deletePost
  } = useCRUD();

  return (
    <div className="app">
      <PostsContext.Provider
        value={{
          deletePost
        }}
      >
        <Pod title="Posts">
          <GridContainer>
            <GridItem gridColumn="1/7">
              <Form onSubmit={createPost} />
            </GridItem>
            <GridItem gridColumn="7/13">
              <PostsList posts={posts} clearPosts={clearPosts} />
            </GridItem>
          </GridContainer>
        </Pod>
      </PostsContext.Provider>
    </div>
  );
}
5. Testing App
Create App.test.js for testing the App component. The App component contains all the functionality of the posts app.
We will use the render, screen and fireEvent from @testing-library/react so import them along with the App component itself.
import React from "react";
import { render, screen, fireEvent } from "@testing-library/react";
import "@testing-library/jest-dom";

import App from "./App";
Create a describe block to store the test cases for App. Inside we need to add some helper code to allow us to test certain Carbon components correctly. Some methods are not implemented in JS dom which we are using in Jest. Jest luckily provides the code for us.
Our beginning test file looks like this with the changes:
import React from "react";
import { render, screen, fireEvent } from "@testing-library/react";
import userEvent from "@testing-library/user-event";
import "@testing-library/jest-dom";

import App from "./App";

describe("App", () => {
  // Needed for some Carbon components
  // https://jestjs.io/docs/manual-mocks#mocking-methods-which-are-not-implemented-in-jsdom
  Object.defineProperty(window, "matchMedia", {
    writable: true,
    value: (query) => ({
      matches: false,
      media: query,
      onchange: null,
      addListener: jest.fn(), // Deprecated
      removeListener: jest.fn(), // Deprecated
      addEventListener: jest.fn(),
      removeEventListener: jest.fn(),
      dispatchEvent: jest.fn()
    })
  });

});
5.1 Test initial state
First lets test the initial state of the posts app. We will check that the default no posts text is visible.
Add an initial state describe block with one test to test that the default no posts text is visible.
The screen object has every query pre-bound to document.body resulting from the render function call. We will use the getByText query to find an element containing the text No posts yet! in the rendered component. getByText will accept string text or regular expressions to match. The expectation will assert the toBeInTheDocument() matcher to ensure the text is present.
describe("initial state", () => {
  test("The default no posts text is visible", () => {
    // getByText will match strings or regular expressions
    expect(screen.getByText(/No posts yet!/i)).toBeInTheDocument();
  });
});
5.2 Test creating data
Now lets test creating data through the form. A good way of finding an input with a label is to use the getByLabelText query.
We will use the userEvent here as an example to mimic user interactions with the UI. Clicking on elements and typing values etc in a similar manner to how the end user will use the application. userEvent functions are async so you should use await when calling them.
Find the inputs for Title and Body and interact with them as if a user was doing it with mouse and keyboard. First fire userEvent.click on an input to trigger the inputs focus, then type a value into the input using the userEvent.type function.
Then find the Create button and call userEvent.click on it. This will submit the form and create the new post.
After the post has been created then we need to check that the post text appears in the rendered UI. Use the getByText query to look for the post text and expect it toBeInTheDocument().
describe("creating data", () => {
  test("adding a new post", async () => {
    // Populate the form inputs
    const textInput = screen.getByLabelText("Title");
    await userEvent.click(textInput);
    await userEvent.type(textInput, "New Great Post Title");

    const textArea = screen.getByLabelText("Body");
    await userEvent.click(textArea);
    await userEvent.type(textArea, "New Great Post Body");

    // Find and click the create button
    const createButton = screen.getByText("Create");
    await userEvent.click(createButton);

    // Check the post was created and is visible
    expect(screen.getByText(/New Great Post Title/i)).toBeInTheDocument();
    expect(screen.getByText(/New Great Post Body/i)).toBeInTheDocument();
  });
});
5.3 Test deleting data
Next we will test deleting data, individual posts and all posts.
Add a describe block for deleting data. This block will have a beforeEach. In the beforeEach we will populate the posts app with some posts that we will test deleting.
We will use fireEvent to trigger events in these examples to show the difference to userEvent.
Find the text inputs using a query and use fireEvent to give them a value. fireEvent.change accepts an element parameter and an event parameter.
fireEvent.change(textInput, { target: { value: "New Post Title 1" } });
This will give us some data to work with in our test cases.
describe("deleting data", () => {
  beforeEach(() => {
    // Populate the form inputs
    let textInput = screen.getByLabelText("Title");
    fireEvent.change(textInput, { target: { value: "New Post Title 1" } });

    let textArea = screen.getByLabelText("Body");
    fireEvent.change(textArea, { target: { value: "New Post Body 1" } });

    // Find and click the create button
    let createButton = screen.getByText("Create");
    fireEvent.click(createButton);

    // Populate the form inputs again
    fireEvent.change(textInput, { target: { value: "New Post Title 2" } });
    fireEvent.change(textArea, { target: { value: "New Post Body 2" } });

    // Find and click the create button
    fireEvent.click(createButton);
  });
});
5.3.1 Test deleting post
Add a test case to the deleting data block for deleting a post. This will test deleting a single post but clicking on its individual delete button.
As there can be multiple posts rendered on the screen will need to be more precise with our query to find the correct delete button.
The getAllByRole query will find all elements with the specified role and parameters. We will use this query to find all elements with a role of button and an accessible name of delete-post. Each delete post button has an aria-label prop set to delete-post.
We will fire a click event on the first element found. Then afterwards we will query the screen to determine the post has been deleted.
test("deleting a post", () => {
  // Check the posts are visible
  expect(screen.getByText(/New Post Title 1/i)).toBeInTheDocument();
  expect(screen.getByText(/New Post Body 1/i)).toBeInTheDocument();

  expect(screen.getByText(/New Post Title 2/i)).toBeInTheDocument();
  expect(screen.getByText(/New Post Body 2/i)).toBeInTheDocument();

  // Find the delete post button for the first post.
  // Getting element with role button and name of delete-post.
  // The accessible name is for simple cases equal to e.g.
  // the label of a form element, or the text content of a button,
  // or the value of the aria-label attribute. In this case it is
  // the aria-label attribute.
  const postDeleteButton = screen.getAllByRole("button", {
    name: "delete-post"
  })[0];
  fireEvent.click(postDeleteButton);

  // Check the post was destroyed and is not visible
  // Use queryByX methods to determine element does not exist
  expect(screen.queryByText(/New Post Title 2/i)).toBeNull();
  expect(screen.queryByText(/New Post Body 2/i)).toBeNull();
  // Post 2 is not deleted
  expect(screen.getByText(/New Post Title 1/i)).toBeInTheDocument();
  expect(screen.getByText(/New Post Body 1/i)).toBeInTheDocument();
});
5.3.2 Test deleting all posts
Finally we will test deleting all posts by clicking on the Clear Posts button.
Add a test case for deleting all posts. Similar to before we check the posts are in the document.
Then the Clear Posts button is found and clicked. Afterwards the screen is queried again to check that the posts are no longer in the UI.
test("deleting all posts", () => {
  // Check the posts are visible
  expect(screen.getByText(/New Post Title 1/i)).toBeInTheDocument();
  expect(screen.getByText(/New Post Body 1/i)).toBeInTheDocument();

  expect(screen.getByText(/New Post Title 2/i)).toBeInTheDocument();
  expect(screen.getByText(/New Post Body 2/i)).toBeInTheDocument();

  // Find and click the clear posts button
  const clearButton = screen.getByText("Clear Posts");
  fireEvent.click(clearButton);

  // Check the posts were destroyed and are not visible
  // Use queryByX methods to determine element does not exist
  expect(screen.queryByText(/New Post Title 1/i)).toBeNull();
  expect(screen.queryByText(/New Post Body 1/i)).toBeNull();

  expect(screen.queryByText(/New Post Title 2/i)).toBeNull();
  expect(screen.queryByText(/New Post Body 2/i)).toBeNull();
});
5.4 Completed App tests
import React from "react";
import { render, screen, fireEvent } from "@testing-library/react";
import "@testing-library/jest-dom";

import App from "./App";

describe("App", () => {
  // Needed for some Carbon components
  // https://jestjs.io/docs/manual-mocks#mocking-methods-which-are-not-implemented-in-jsdom
  Object.defineProperty(window, "matchMedia", {
    writable: true,
    value: (query) => ({
      matches: false,
      media: query,
      onchange: null,
      addListener: jest.fn(), // Deprecated
      removeListener: jest.fn(), // Deprecated
      addEventListener: jest.fn(),
      removeEventListener: jest.fn(),
      dispatchEvent: jest.fn()
    })
  });

  test("Initial state", async () => {
    expect(screen.getByText(/No posts yet!/i)).toBeInTheDocument();
  });

  describe("creating data", () => {
    beforeEach(() => {
      render(<App />);
    });

    test("adding a new post", async () => {
      // Populate the form inputs
      const textInput = screen.getByLabelText("Title");
      await userEvent.click(textInput);
      await userEvent.type(textInput, "New Great Post Title");

      const textArea = screen.getByLabelText("Body");
      await userEvent.click(textArea);
      await userEvent.type(textArea, "New Great Post Body");

      // Find and click the create button
      const createButton = screen.getByText("Create");
      await userEvent.click(createButton);

      // Check the post was created and is visible
      expect(screen.getByText(/New Great Post Title/i)).toBeInTheDocument();
      expect(screen.getByText(/New Great Post Body/i)).toBeInTheDocument();
    });
  });

  describe("deleting data", () => {
    beforeEach(() => {
      render(<App />);

      // Populate the form inputs
      let textInput = screen.getByLabelText("Title");
      fireEvent.change(textInput, { target: { value: "New Post Title 1" } });

      let textArea = screen.getByLabelText("Body");
      fireEvent.change(textArea, { target: { value: "New Post Body 1" } });

      // Find and click the create button
      let createButton = screen.getByText("Create");
      fireEvent.click(createButton);

      // Populate the form inputs again
      fireEvent.change(textInput, { target: { value: "New Post Title 2" } });
      fireEvent.change(textArea, { target: { value: "New Post Body 2" } });

      // Find and click the create button
      fireEvent.click(createButton);
    });

    test("deleting a post", () => {
      // Find the delete post button for the first post.
      // Getting element with role button and name of delete-post.
      // The accessible name is for simple cases equal to e.g.
      // the label of a form element, or the text content of a button,
      // or the value of the aria-label attribute. In this case it is
      // the aria-label attribute.
      const postDeleteButton = screen.getAllByRole("button", {
        name: "delete-post"
      })[0];
      fireEvent.click(postDeleteButton);

      // Check the post was destroyed and is not visible
      // Use queryByX methods to determine element does not exist
      expect(screen.queryByText(/New Post Title 2/i)).toBeNull();
      expect(screen.queryByText(/New Post Body 2/i)).toBeNull();
      // Post 2 is not deleted
      expect(screen.getByText(/New Post Title 1/i)).toBeInTheDocument();
      expect(screen.getByText(/New Post Body 1/i)).toBeInTheDocument();
    });

    test("deleting all posts", () => {
      // Check the posts are visible
      expect(screen.getByText(/New Post Title 1/i)).toBeInTheDocument();
      expect(screen.getByText(/New Post Body 1/i)).toBeInTheDocument();

      expect(screen.getByText(/New Post Title 2/i)).toBeInTheDocument();
      expect(screen.getByText(/New Post Body 2/i)).toBeInTheDocument();

      // Find and click the clear posts button
      const clearButton = screen.getByText("Clear Posts");
      fireEvent.click(clearButton);

      // Check the posts were destroyed and are not visible
      // Use queryByX methods to determine element does not exist
      expect(screen.queryByText(/New Post Title 1/i)).toBeNull();
      expect(screen.queryByText(/New Post Body 1/i)).toBeNull();

      expect(screen.queryByText(/New Post Title 2/i)).toBeNull();
      expect(screen.queryByText(/New Post Body 2/i)).toBeNull();
    });
  });
});

One thought on “React context and custom Hooks tutorial”